No-Bake Cookies
2 tbs. cocoa
2 c. sugar
dash of salt
3/4 c. milk
1 t. vanilla
3/4 c. peanut butter
3 - 3 1/2 c. oatmeal
Mix cocoa, sugar, salt, and milk in saucepan. Bring to a boil and cook 3 minutes on medium.
Turn off heat and stir in vanilla and peanut butter.
Add cocoa peanut butter mixture to separate bowl with oats already in it. Mix well and drop by spoonfuls onto waxed paper.
Makes approximately 18.
Refrigerate until hard and enjoy!
Showing posts with label cookies. Show all posts
Showing posts with label cookies. Show all posts
Friday, April 17, 2009
Friday, February 6, 2009
Glaze for Sugar Cookies

Glacé Icing
1lb powdered sugar (about 3 3/4 C)
1/4 C + 2T C whole milk (low-fat actually works, but use whole if you can)
1/4 C + 2T light Corn Syrup
1 t extract (I use almond because I use almond in my sugar cookies)
With a whisk, combine sugar and milk until smooth (no lumps!) Then stir in corn syrup and extract.
You will use this same recipe for both glazing and piping. The way it is right now is the consistency you want for glazing. It's smooth and thin, like in the picture below. It easily runs off the whisk in a pretty thin drizzle.
To prepare the icing for piping, you just add more powdered sugar. Just eyeball it. You can't really mess it up because if it's too thick you just add more milk and if it's to thin, you add more powdered sugar. I add it in small amounts until it's a good consistency. For me, it's when it gets to a point where it's relatively hard to whisk it by hand. When I pick up the whisk, it still runs off, but in a very slow, thick stream now, like this:
Take your glazing icing and separate it into bowls if you want to color it. I decided to do red (more pink, but I love it!), green, and blue. And I left my piping icing white. Use gel food coloring (you can find it at craft or cooking stores) for more intense colors.
There are a few ways to use icing like this. One way is to just glaze the cookie and leave it like that. I'm going to glaze it and then pipe a decoration on top. So the first step is to glaze. Take a small spoon and drop a spoonful of glaze onto a cookie. (Do one at a time, I'm just doing 3 for picture-taking-fun)
Then take a small spoon (baby spoons work great) and gently spread it out to the edges of the cookie. If you want the cookie completely covered, you could just hold it by the bottom and dip it in, then place it over a rack to let the excess drip off.
You need to wait for the icing to set before you pipe on top of it. It doesn't have to be completely dry, but just set on top. An hour or two will probably be enough, but it depends on humidity and everything, so just barely touch the top and don't smash the glaze because it will probably still be soft underneath. If it's dry to the touch you can go ahead and decorate.
With your piping icing (the thicker stuff) in a pastry bag (I just used a plain, round tip), just draw on your design. I started doing little snowflakes and pretty much fell in love with them. These little cuties are about an inch and a half in diameter. How adorable are they?? I just get happy every time I look at this picture.
The next method is to do do the piping first, and then fill in with the glaze. So for these shapes below, I just took my pastry bag and piped the white icing around the edges.
Great Tip: when you do dots, or when you start or finish a line, you may get a little peak of icing. If you try to smash it down, it will stick to your fingers and then you'll make a big mess and maybe say a naughty word. Just get your finger wet and gently press down. It won't stick and all of your problems will be solved.
You can fill them soon after outlining. The piping will act as a dam and hold the glaze in. So just drop a spoonful of glaze in the middle of the cookie and with a small spoon, or clean paint brush, or toothpick for small spaces, gently spread the icing out until it fills the cookie in.
While the glaze is wet, it's kind of like paint. You can have fun combining different colors and swirling around for cool patterns. In these ones I just used a toothpick to make designs.
The last method is to outline the cookies with piping, then fill them with glaze, and then pipe again on top. You could then color different piping bags and decorate cookies like snowmen, santas etc. I think monograms are really cute too, especially for things like baby and wedding showers. Here's some letters I did. Oooh, or how about an ABC theme for a toddler's birthday party? That would be cute too.
If you're going to do this method, it may seem like a lot of steps. To break it up, you could bake your cookies one night and put them in an air-tight container. Then the next day glaze them and the next day give them away. Or if you ice them in the morning, they might be dry enough to stack and pack that night. I tested my cookies, and on the third day they were still soft and super yummy.
And speaking of birthday parties...
this is for someone special today :)
No matter which method you use, the glaze will need to dry completely overnight.
* And FYI, I'll post my sugar cookie recipe next week. It's a great one for cookie cutters!
Print this page
Wednesday, February 4, 2009
World Peace Cookies

World Peace Cookies
Baking: From My Home to Yours, Dorie Greenspan
1 1/4 cups all-purpose flour
1/3 cup unsweetened cocoa powder
1/2 teaspoon baking soda
1 stick plus 3 tablespoons (11 tablespoons) unsalted butter, at room temperature
2/3 cup (packed) light brown sugar
1/4 cup sugar
1/2 teaspoon fleur de sel or 1/4 teaspoon fine sea salt
1 teaspoon vanilla extract
5 ounces bittersweet chocolate, chopped into chips, or a generous 3/4 cup store-bought mini chocolate chips
Makes about 36 cookies.
Sift the flour, cocoa and baking soda together.
Working with a stand mixer, preferably fitted with a paddle attachment, or with a hand mixer in a large bowl, beat the butter on medium speed until soft and creamy. Add both sugars, the salt and vanilla extract and beat for 2 minutes more.
Turn off the mixer. Pour in the flour, drape a kitchen towel over the stand mixer to protect yourself and your kitchen from flying flour and pulse the mixer at low speed about 5 times, a second or two each time. Take a peek — if there is still a lot of flour on the surface of the dough, pulse a couple of times more; if not, remove the towel. Continuing at low speed, mix for about 30 seconds more, just until the flour disappears into the dough — for the best texture, work the dough as little as possible once the flour is added, and don’t be concerned if the dough looks a little crumbly. Toss in the chocolate pieces and mix only to incorporate.
Turn the dough out onto a work surface, gather it together and divide it in half. Working with one half at a time, shape the dough into logs that are 1 1/2 inches in diameter. Wrap the logs in plastic wrap and refrigerate them for at least 3 hours. (The dough can be refrigerated for up to 3 days or frozen for up to 2 months. If you’ve frozen the dough, you needn’t defrost it before baking — just slice the logs into cookies and bake the cookies 1 minute longer.)
GETTING READY TO BAKE: Center a rack in the oven and preheat the oven to 325 degrees F. Line two baking sheets with parchment or silicone mats.
Working with a sharp thin knife, slice the logs into rounds that are 1/2 inch thick. (The rounds are likely to crack as you’re cutting them — don’t be concerned, just squeeze the bits back onto each cookie.) Arrange the rounds on the baking sheets, leaving about 1 inch between them.
Bake the cookies one sheet at a time for 12 minutes — they won’t look done, nor will they be firm, but that’s just the way they should be. Transfer the baking sheet to a cooling rack and let the cookies rest until they are only just warm, at which point you can serve them or let them reach room temperature.
SERVING: The cookies can be eaten when they are warm or at room temperature — I prefer them at room temperature, when the textural difference between the crumbly cookie and the chocolate bits is greatest — and are best suited to cold milk or hot coffee.
STORING: Packed airtight, cookies will keep at room temperature for up to 3 days; they can be frozen for up to 2 months.
Friday, January 23, 2009
chocolate cookies-low fat

CHOCOLATE CHIP COOKIES
(Made with white beans)
½ cup cooked white beans
1 cup brown sugar
4 eggs (1/4 C. Egg Powder + 1/2 C. Water)
1 tsp. vanilla
2 ¼ cups wheat flour
1 tsp. baking powder
½ tsp. baking soda
½ tsp. salt
2 cups chocolate chips
1 cup pecans (or walnuts) chopped
Beat beans and sugar together. Add eggs, vanilla. In separate bowl sift together flour, baking soda, baking powder and salt. Add flour moisture to bean/sugar mixture. Stir until well blended. Stir in chocolate chips, and nuts. Cover and refrigerate dough for 1 hour. Preheat oven to 350°F. Drop by tablespoonfuls onto greased cookie sheet. Bake 10-15 minutes depending on size of cookies. Makes 4 dozen
Sunday, November 2, 2008
Take 5 Cookies

1 cup unsalted butter
1 cup dark brown sugar
1/2 cup sugar
1/4 cup dark corn syrup
3/4 tsp. baking soda
1 tsp. salt
2 tsp vanilla extract
2 large eggs
2 Cups creamy peanut butter
2 cups all-purpose flour
2 cups chocolate chunks (your choice of intensity, just use good chocolate)
large double fisted handful of pretzel sticks lightly crushed (good and salty)
soft caramels to melt and drizzle
Preheat oven to 325. Line baking sheets with parchment.
In medium bowl, cream together butter, sugars, corn syrup, baking soda, salt, and vanilla. Add eggs one at a time, beating well after each addition. Add the peanut butter, beating until the mixture is light and fluffy. Stir in the flour. Mix in half of the chocolate and half of the pretzels.
Drop dough by soup spoon full onto cookie sheets. Add 3 or 4 more chunks of chocolate on top and a few nice size pieces of pretzel so that they will show nicely when baked off.
Bake the cookies for 15 minutes, until they are lightly golden around the edges. Remove from the oven and cool on a cooling rack.
When cool drizzle with caramel. YUMMMMMMMMMMMMM!
Yield: approximately 40 cookies
Tuesday, October 28, 2008
Soft & Spicey Ginger Cookies
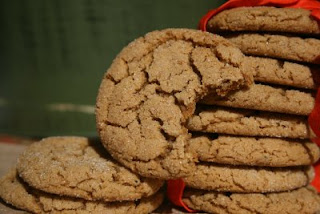
Money Saving Tips: Since this cookie relies on oil instead of butter, it's one of the most economical you can make. This is my first pick whenever I have to make enormous amounts of cookies for bake sales, church parties, Italian family gatherings or other crowded events. If you don't have sour cream, use yogurt.
Spicy and Soft Ginger Cookies
$2.00 for 40 cookies
1/2 cup canola oil (or vegetable oil)
1/4 cup sour cream
1 cup granulated sugar
1/4 cup molasses
1 egg
1/2 to 1 teaspoon black pepper
1 teaspoon cinnamon
1 teaspoon ginger
1/4 teaspoon salt
2 and 1/2 teaspoons baking soda
2 cups plus 2 tablespoons flour (I used half whole wheat)
cinnamon sugar for rolling the cookies (about 1/2 cup granulated sugar and 1/2 teaspoon cinnamon)
Preheat oven to 350 degrees. In a medium bowl, cream together the oil, sour cream, sugar, and molasses. Stir in the egg. Add pepper, cinnamon, ginger, salt, and soda. Stir in flour. The dough will be soft and only slightly sticky. Form dough into 1 inch balls. Roll in cinnamon sugar and place on cookie sheets about two inches apart. Bake for 8-10 minutes, or until cookies are spread and beginning to look crackly. For softer cookies, underbake slightly and for crispier ones, let them go a minute or two longer. Let cool on cookie sheets for two minutes. Transfer to rack.
****These sturdy cookies are great for packaging and mailing.
Sunday, October 26, 2008
Chewy Chocolate Gingerbread Cookies
Makes 2 dozen
7 ounces best-quality semisweet chocolate
1 1/2 cups plus 1 tablespoon all-purpose flour
1 1/4 teaspoons ground ginger
1 teaspoon ground cinnamon
1/4 teaspoon ground cloves
1/4 teaspoon ground nutmeg
1 tablespoon cocoa powder
8 tablespoons (1 stick) unsalted butter
1 tablespoon freshly grated ginger
1/2 cup dark-brown sugar, packed
1/2 cup unsulfured molasses
1 teaspoon baking soda
1/4 cup granulated sugar
Directions
Line two baking sheets with parchment. Chop chocolate into 1/4-inch chunks; set aside. In a medium bowl, sift together flour, ground ginger, cinnamon, cloves, nutmeg, and cocoa.
In the bowl of an electric mixer, fitted with the paddle attachment, beat butter and grated ginger until whitened, about 4 minutes. Add brown sugar; beat until combined. Add molasses; beat until combined.
In a small bowl, dissolve baking soda in 1 1/2 teaspoons boiling water. Beat half of flour mixture into butter mixture. Beat in baking-soda mixture, then remaining half of flour mixture. Mix in chocolate; turn out onto a piece of plastic wrap. Pat dough out to about 1 inch thick; seal with wrap; refrigerate until firm, 2 hours or more.
Heat oven to 325 degrees. Roll dough into 1 1/2- inch balls; place 2 inches apart on baking sheets. Refrigerate 20 minutes. Roll in granulated sugar. Bake until the surfaces crack slightly, 10 to 12 minutes. Let cool 5 minutes; transfer to a wire rack to cool completely.
Friday, October 24, 2008
Chocolate Chip Treasure Cookies

from Debbie R. via Aunt Marilyn
1 1/2 cups graham cracker crumbs (about 25-30 squares)
1/2 cup flour
2 teaspoons baking powder
1 14 oz. can sweetened condensed milk
1/2 cup butter, room temperature
1 1/3 cups coconut
2 cups (1 package) semisweet chocolate chips
1 cup walnuts, chopped (I usually leave these out due to my husband's preference - the cookies are delicious with or without nuts)
Preheat oven to 350 degrees. In a small bowl, mix graham cracker crumbs, flour and baking powder. In a large bowl, beat sweetened condensed milk and butter until smooth. Add graham cracker crumb mixture; mix well. Stir in coconut, chocolate chips and walnuts. Drop by rounded tablespoons onto ungreased cookie sheets. Bake 9-10 minutes or until lightly browned.
Subscribe to:
Posts (Atom)